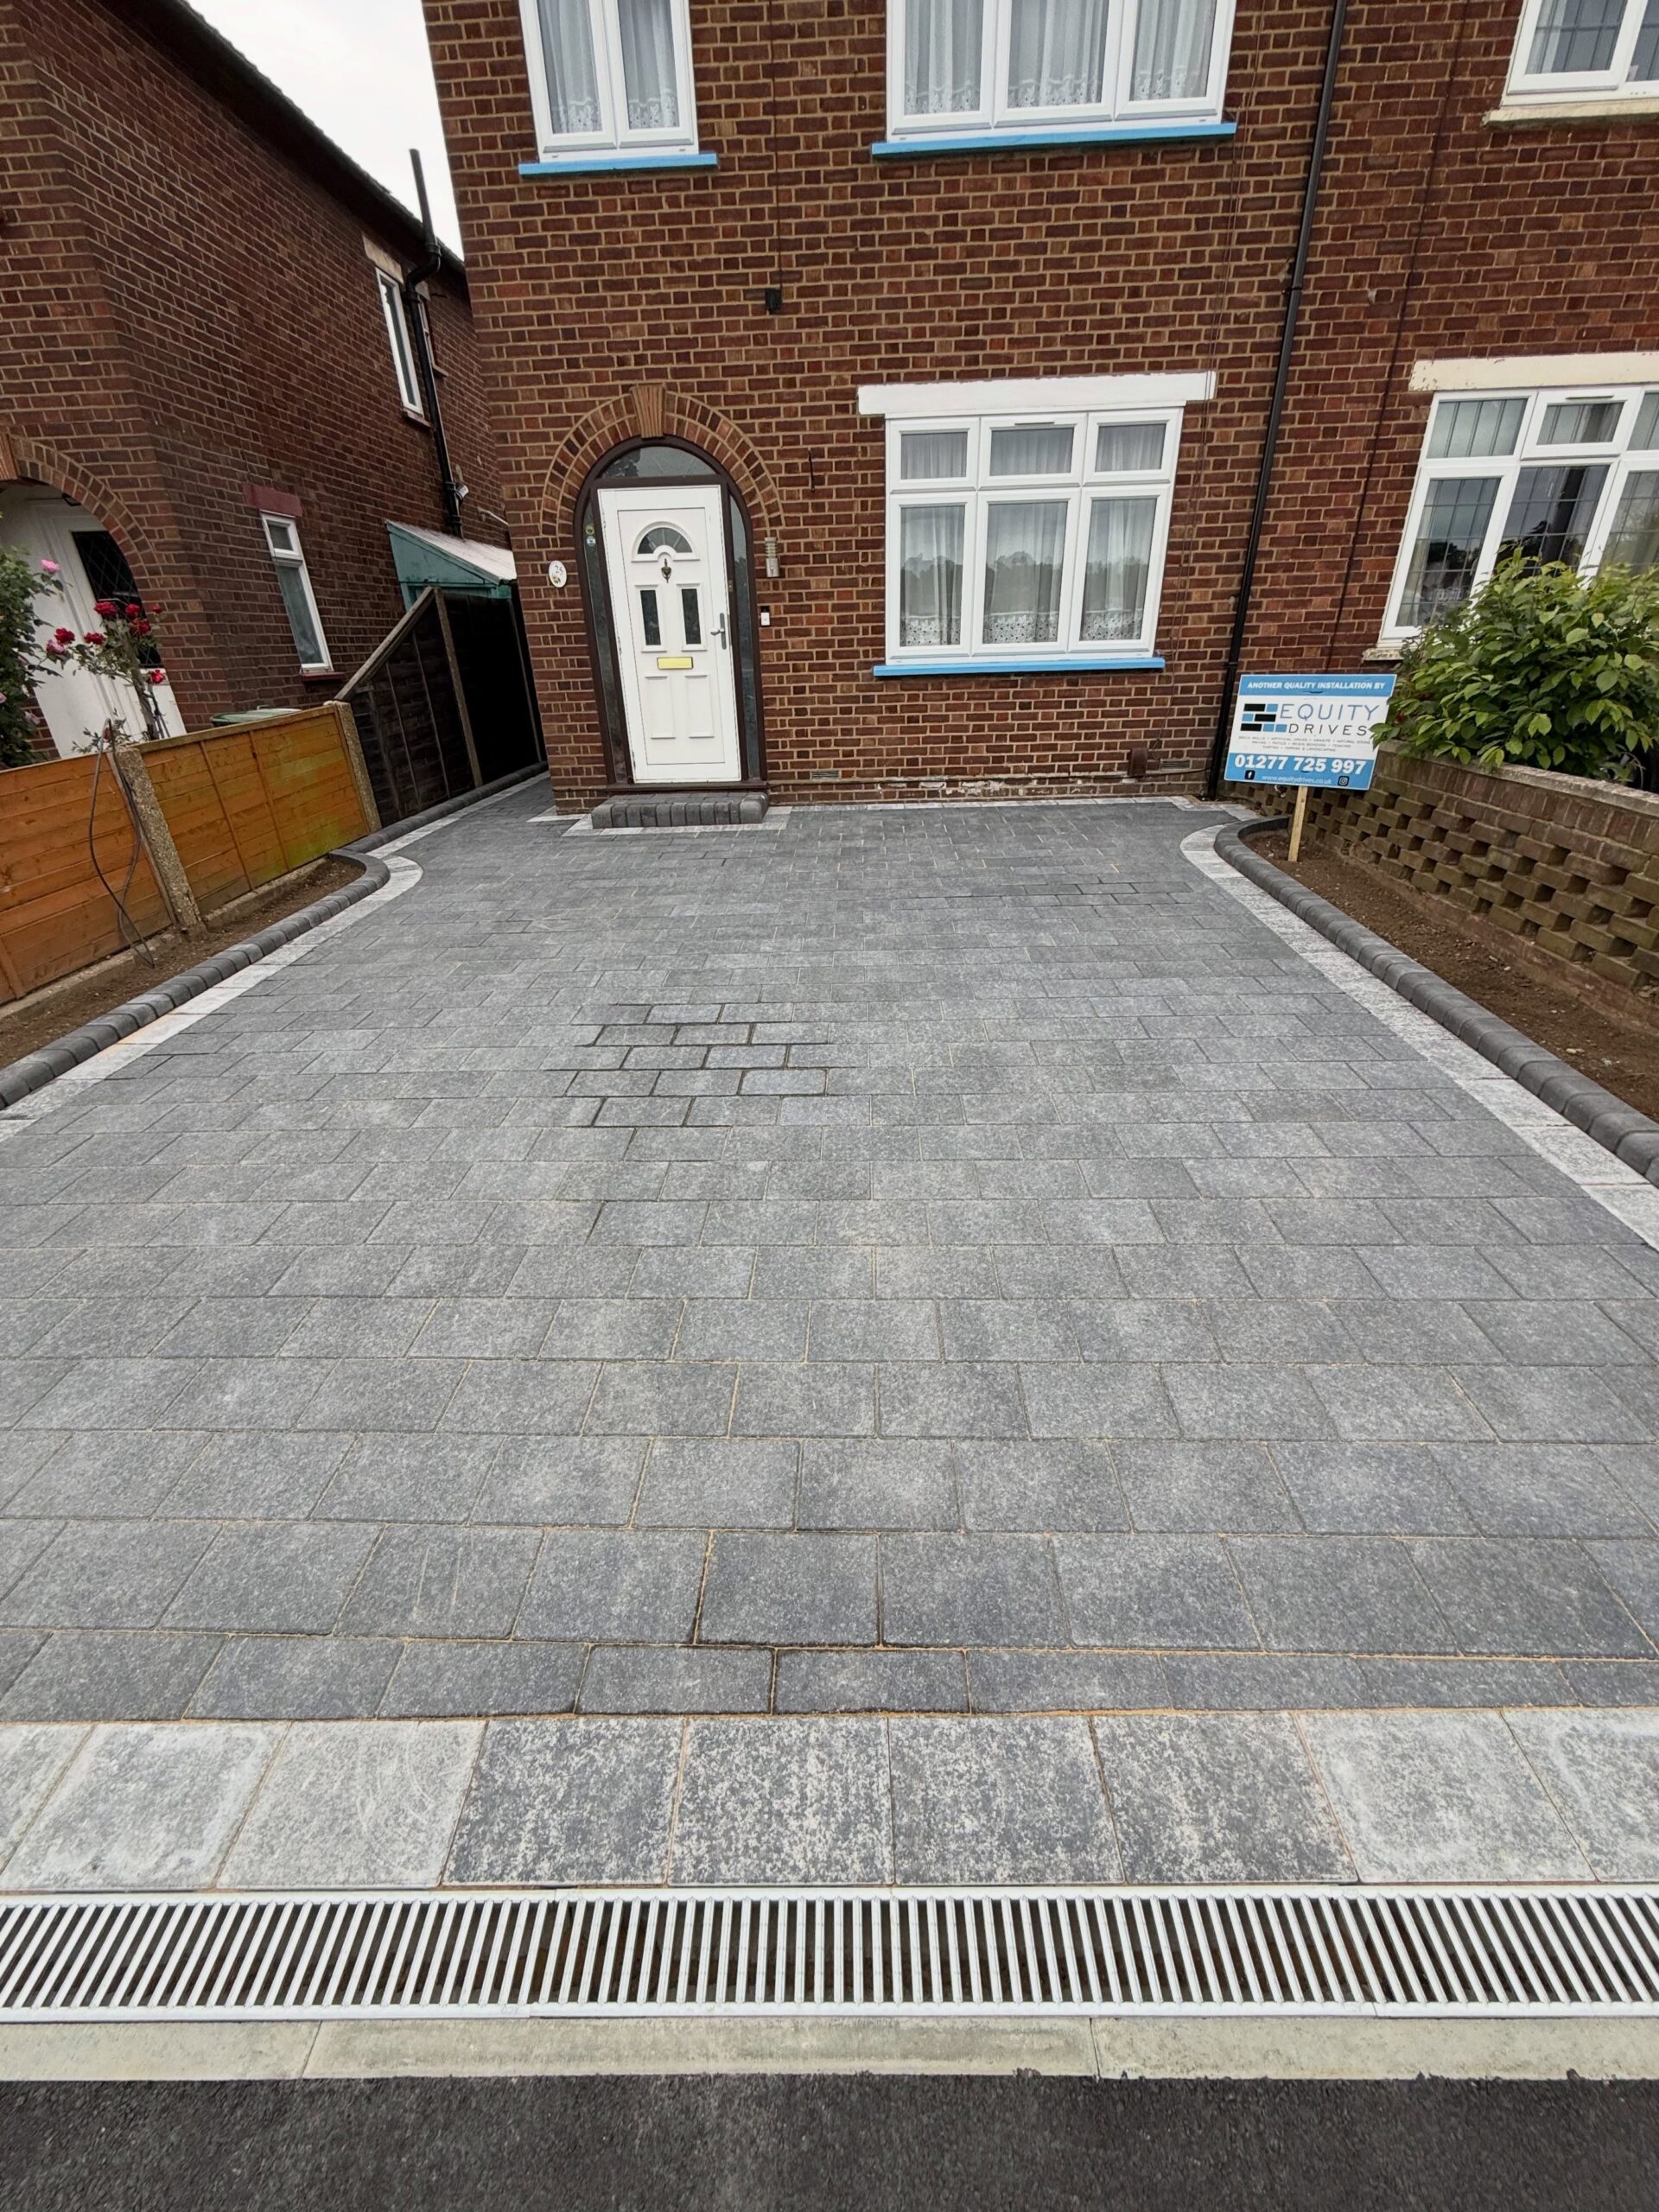
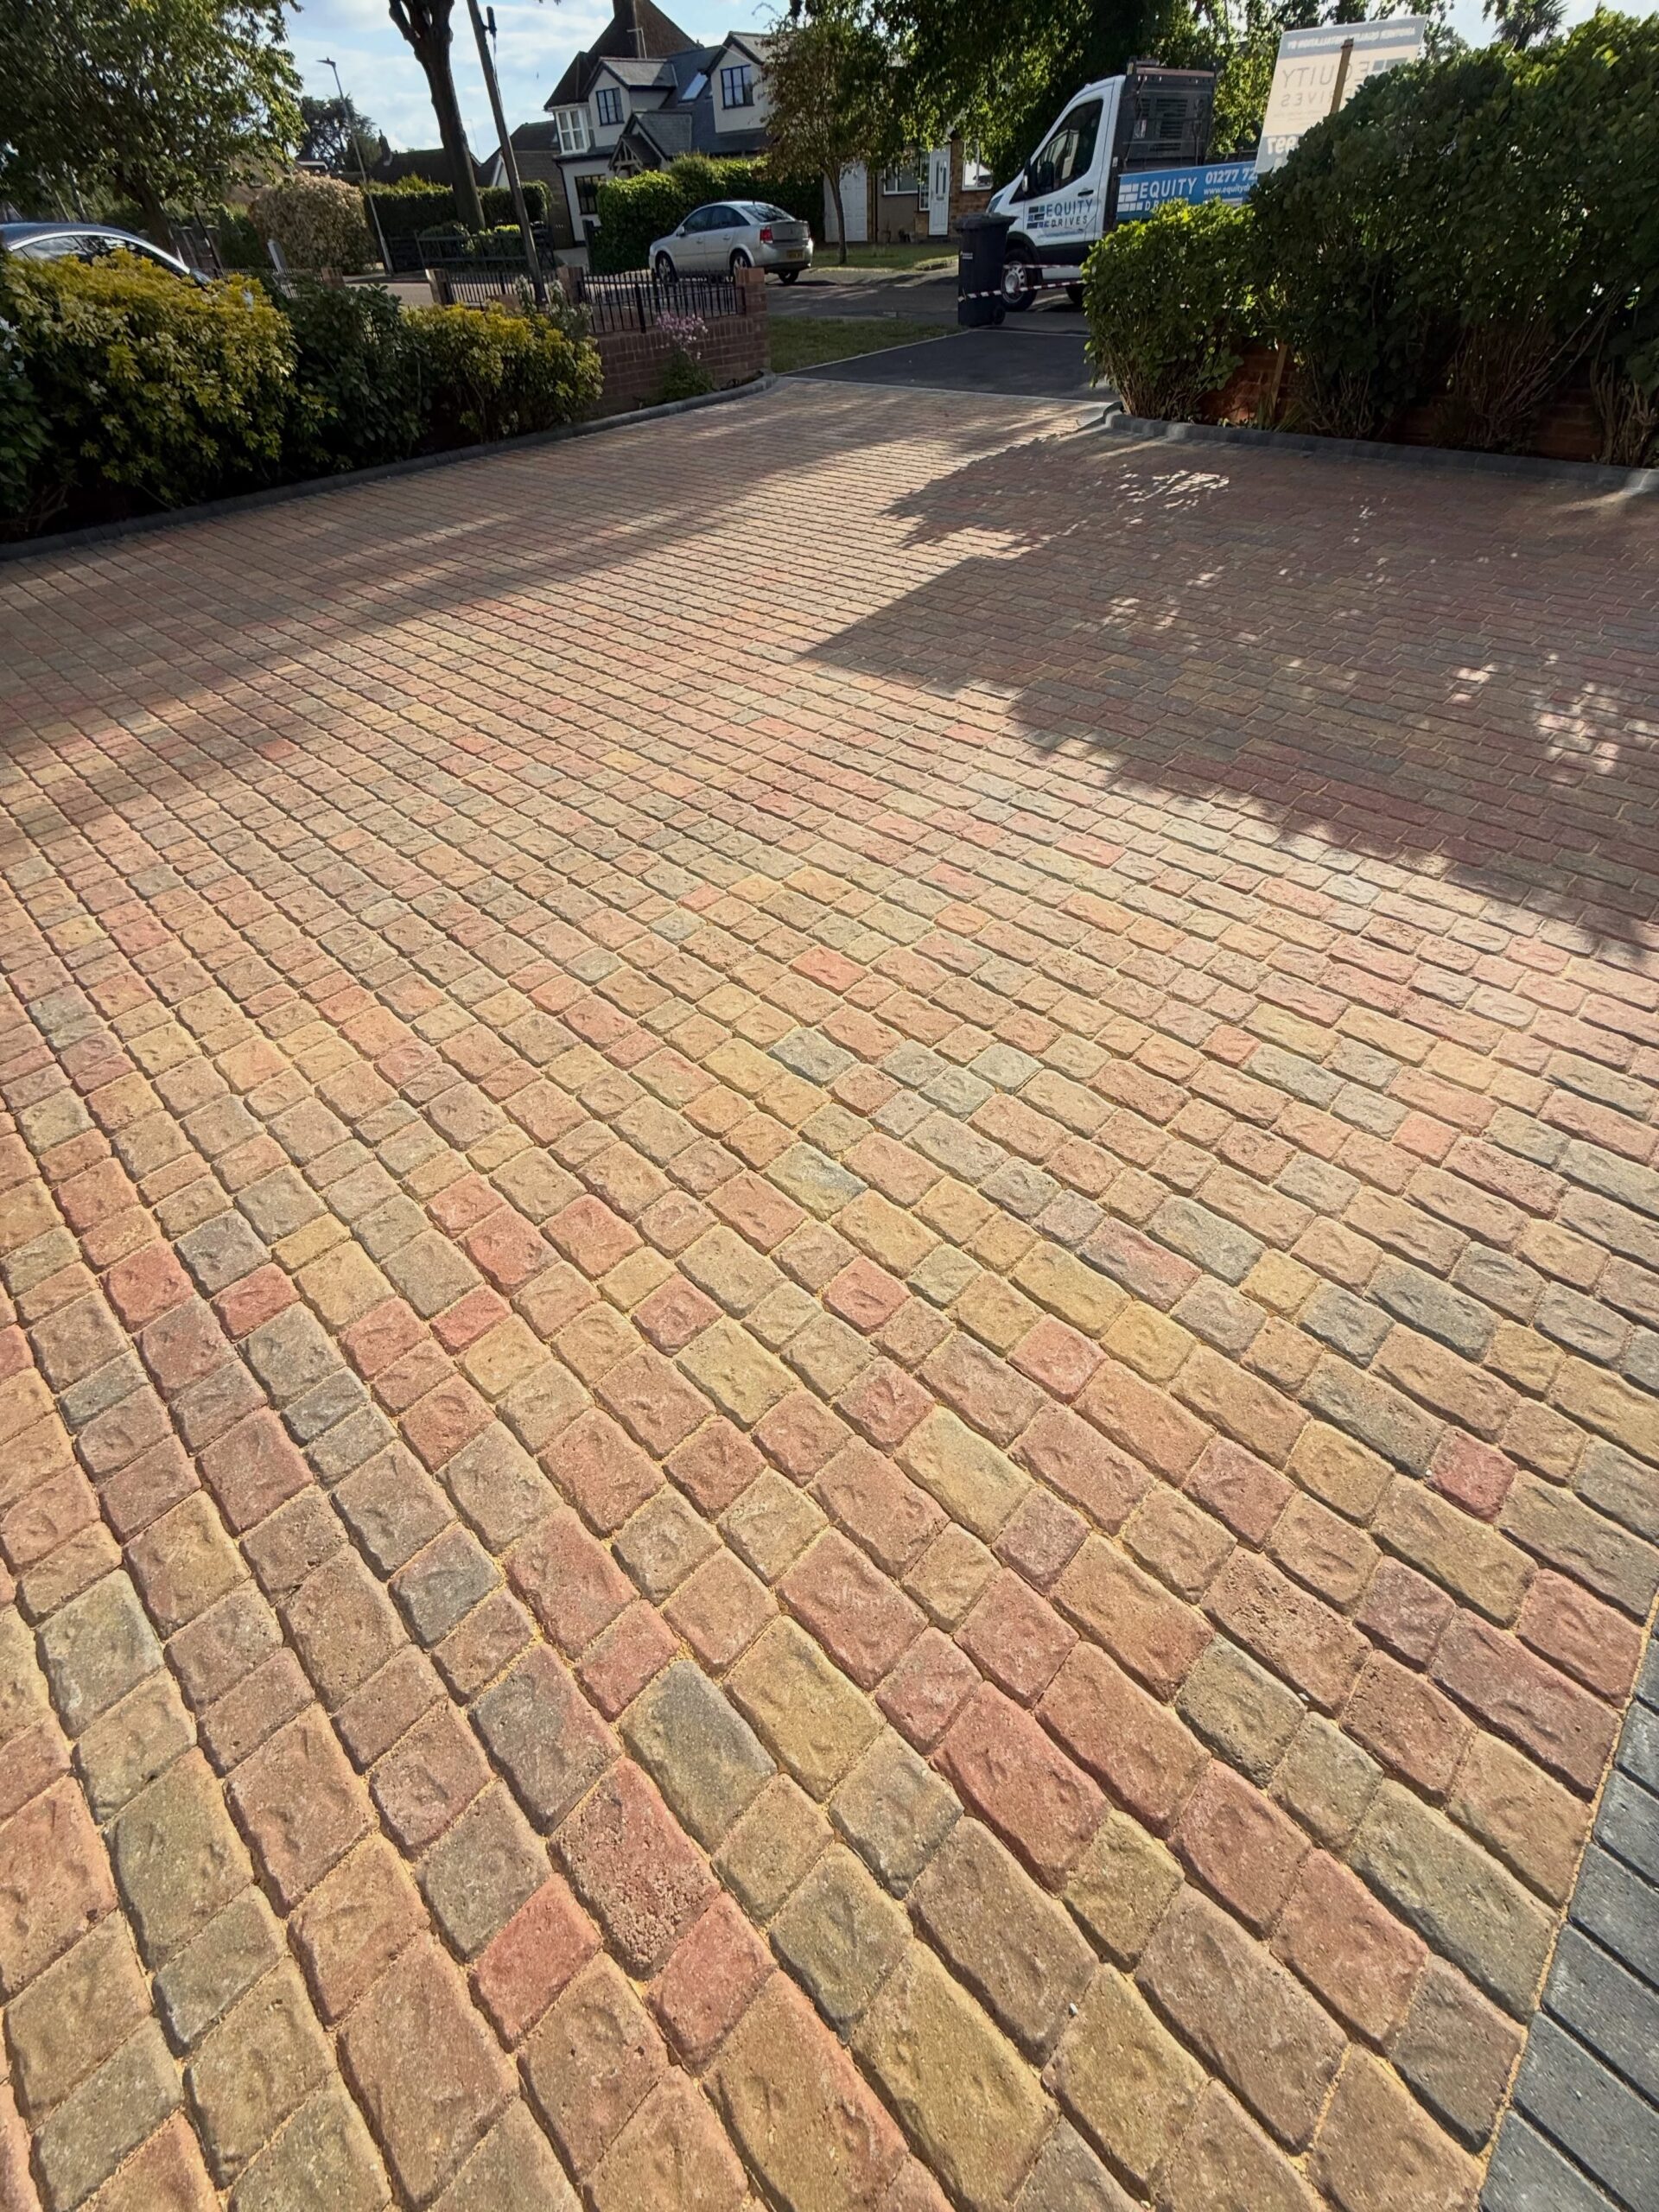
Driveway installation is the full process of building a safe, strong, and long-lasting surface for cars. It starts with planning, site checks, ground preparation, excavation, drainage design, sub-base work, edging, surface laying, and final curing. Each stage supports the next one, so the driveway stays level, drains well, and handles daily vehicle use.
The work usually begins with site planning and groundworks. The installer checks the soil, slope, access, driveway size, water flow, and surface choice. The old surface is then removed, including tarmac, concrete, paving, turf, roots, weeds, and loose material. This gives the new driveway a clean and stable base.
Ground preparation is one of the most important parts of driveway installation. The area is dug to the right depth, shaped for drainage, and checked for weak spots. A geotextile membrane is often laid over the soil before the sub-base is added. MOT Type 1 stone or crushed concrete is then compacted in layers to create a firm foundation. Poor ground preparation often leads to sinking, cracks, puddles, and early driveway failure.
Drainage also affects the strength and lifespan of the driveway. Rainwater must move away from the house, paths, garage, and road. Some driveways need channel drains, soakaways, permeable paving, gravel, resin-bound stone, or a free-draining sub-base. Poor drainage weakens the ground, damages the sub-base, causes puddles, and increases frost damage in winter.
The best driveway surface depends on the site, budget, look, use, and drainage needs. Resin-bound driveways give a clean and modern finish. Block paving offers pattern and repair flexibility. Tarmac works well for larger areas. Gravel is cost-friendly and quick to lay. Concrete gives a hard and durable surface when installed correctly. Each surface needs the right excavation depth, sub-base, edging, drainage, and curing time.
Driveway installation usually takes about 3 to 7 days, but larger or more complex projects may take longer. Timescales depend on driveway size, access, weather, ground condition, drainage work, and chosen material. Winter installation is possible, but it needs extra care because cold, wet, or frozen ground affects digging, compaction, bonding, and curing.
Most driveway problems come from poor installation. Common mistakes include shallow excavation, weak sub-base layers, poor compaction, bad drainage, loose edging, rushed curing, and using the driveway too soon. A strong driveway depends on clear planning, skilled installers, proper ground preparation, safe drainage, good materials, and enough time for each stage.
What does driveway installation involve?
Driveway installation is the full process of building a firm, drained, and usable surface for vehicles. It covers site checks, ground digging, base work, drainage, edging, surface laying, and final finishing. The work starts with a check of the area. The installer looks at the ground, soil, slope, access, and water flow. This helps plan the right depth, base, and surface type.
Next, the old surface, soil, weeds, and waste are removed. The ground is then dug to the right depth. A strong sub-base is added with crushed stone or hardcore. This layer is compacted well, so the driveway stays level and does not sink. Drainage is also a key part of driveway installation. Good drainage helps stop puddles, water run-off, and surface damage. Edges or kerbs are then set in place to hold the driveway shape.
The final stage is laying the chosen surface. This may be block paving, resin, tarmac, gravel, or concrete. The surface is levelled, finished, and left to cure where needed before cars use it.
How is a driveway installed?
A driveway is installed by digging out the old ground, building a strong base, adding drainage, and laying the chosen surface. The aim is to make a firm, level, and safe area for cars. The installer first marks the driveway shape with lines and pegs. They check the slope, soil, access, and water flow. This helps set the right digging depth. The old surface, loose soil, grass, and waste are then removed. The ground is dug down to suit the driveway type and vehicle weight. This helps stop later sinking.
A geotextile membrane is laid over the soil. This fabric keeps the base stone separate from the earth. It also helps water drain through the ground. A sub-base is then added with MOT Type 1 stone or crushed concrete. The installer spreads it in layers and compacts each layer with a whacker plate. This creates the main strength of the driveway. Edges or kerbs are set in concrete to hold the shape. A bedding layer is added where needed. Sharp sand is used for block paving. Gravel grids use a firm stone base. Concrete and tarmac need their own base and finish layers.
The final surface is laid, levelled, and compacted. Block paving is jointed with kiln-dried sand. Gravel is raked even. Concrete and tarmac are left to set before use.
What are the steps for driveway installation?
Driveway installation steps are the main stages used to build a strong, level, and long-lasting driveway. The work covers ground digging, drainage, edging, base work, surface laying, and final finishing.
The first step is site preparation. The old surface, grass, roots, and waste are removed. The area is then dug to the right depth for the soil, driveway size, and surface type.
The second step is drainage and edging. The ground is shaped with a slight fall, so rainwater runs away from the house. Kerbs, blocks, or timber edges are then fixed in place to hold the driveway firm.
The third step is the sub-base. A geotextile membrane is laid over the soil. MOT Type 1 stone or crushed concrete is then spread in layers. Each layer is compacted with a whacker plate to stop sinking.
The fourth step is surface laying. Block paving uses sharp sand and kiln-dried sand in the joints. Gravel is spread and raked level. Resin, concrete, and tarmac are laid on a firm base and finished smooth.
The final step is checking and curing. The installer checks the level, edges, joints, and water flow. Some driveway surfaces need time to set before cars park on them.
What are the main driveway installation steps?
Driveway installation involves four main phases: excavation (clearing and digging 8-12 inches down), base work, drainage with edging, and surface laying. These driveway installation steps create a firm, level, and safe surface for cars.
A successful driveway installation typically follows these core steps:
- Ground preparation: The old surface, grass, roots, and loose soil are removed. The ground is then dug to the right depth.
- Sub-base work: A membrane is laid over the soil. Crushed stone is then spread and compacted in layers to stop sinking.
- Drainage and edging: The driveway is shaped with a slight fall for rainwater. Kerbs or borders are fixed to hold the surface in place.
- Surface laying: The chosen finish is laid, levelled, and compacted. This may be block paving, resin, tarmac, gravel, or concrete.
Most installation timescales depend on the size, weather, and surface type. Winter installation needs extra care, as wet or frozen ground affects the base. Common installation mistakes include poor digging, weak compaction, and bad drainage.
How does driveway installation start?
Driveway installation starts with site planning and groundworks. This means checking the area, marking the driveway layout, planning drainage, and preparing the ground before any new surface is laid.
The first stage sets the strength, shape, and finish of the driveway. Poor ground preparation often leads to sinking, cracks, puddles, and loose edges later.
- Site check: The installer checks the driveway size, soil type, slope, access, and water flow.
- Layout marking: The driveway shape is marked with lines, pegs, or spray marks.
- Drainage planning: Rainwater flow is planned so water moves away from the house and does not sit on the surface.
- Surface removal: Old tarmac, paving, concrete, grass, roots, and waste are cleared away.
- Ground excavation: The area is dug to the right depth for the chosen driveway surface and vehicle use.
- Base preparation: The ground is levelled and made ready for the membrane, sub-base, edging, and final surface.
Installation timescales depend on the driveway size, weather, and material. Winter installation needs extra care because wet or frozen ground affects digging, compaction, and curing.
What happens during driveway excavation?
Driveway excavation is the process of digging out the site to create a stable foundation. It involves clearing the existing surface, such as tarmac, concrete, paving, grass, or soil, before the new driveway base is built.
Here is exactly what happens during the project:
- Area clearing: The old surface, weeds, roots, rubble, and waste are removed from the driveway area.
- Ground marking: The driveway layout is marked so the team knows the exact shape, width, and edge line.
- Digging out: The ground is dug to the right depth for the surface type, soil, and vehicle use.
- Soil check: The installer checks for soft spots, poor ground, or wet areas that need extra work.
- Waste removal: Spoil, broken concrete, old tarmac, and loose soil are taken away from the site.
- Ground levelling: The base area is shaped and levelled to prepare for drainage, membrane, and sub-base stone.
- Drainage fall: A slight slope is formed so rainwater moves away from the house and does not sit on the driveway.
Excavation is one of the most important driveway installation steps. Good ground preparation helps prevent sinking, cracks, weak edges, and puddles. Installation timescales may change in winter, as wet or frozen ground makes digging and compaction harder.
Why is old surface removal important before driveway installation?
Removing old surface materials is essential before a new driveway installation because it eliminates compromised layers, weak spots, roots, loose stone, broken tarmac, and cracked concrete. Old surface removal means clearing the existing driveway area so the new base and surface sit on clean, stable ground.
Here is why old surface removal is so important:
- Better ground preparation: A clean site gives the driveway a firm start. It helps the sub-base sit level and compact well.
- Fewer sinking risks: Weak old layers often move under vehicle weight. Removing them helps stop dips, ruts, and uneven areas.
- Improved drainage: Old surfaces may hide poor falls and blocked water paths. Clearing the area helps plan better water flow.
- Stronger driveway edges: Old broken edges reduce support. Full removal helps new kerbs, blocks, or borders stay firm.
- Cleaner installation steps: Each stage works better when the site is clear. This includes digging, membrane laying, base work, and surface laying.
- Fewer installation mistakes: Many driveway problems start below the surface. Poor removal leads to cracks, puddles, loose paving, and early repair work.
Installation timescales depend on the surface being removed, the size of the area, and the weather. Winter installation needs more care because wet or frozen ground makes removal and compaction harder.
How is the ground prepared for a driveway?
Proper ground preparation is the backbone of a durable driveway. Ground preparation means clearing, digging, shaping, draining, and compacting the site before the final driveway surface is laid.
Here is the standard step-by-step process for preparing the ground:
- Clear the site: Old tarmac, concrete, paving, grass, roots, weeds, and waste are removed.
- Mark the layout: The driveway shape, edges, access points, and parking space are marked clearly.
- Excavate the area: The ground is dug to the right depth for the surface type, soil, and vehicle weight.
- Check the levels: The installer checks the slope so rainwater moves away from the house.
- Plan drainage: Drainage channels, soakaway points, or permeable layers are planned where needed.
- Lay the membrane: A geotextile membrane is placed over the soil to separate earth from the stone base.
- Add the sub-base: MOT Type 1 stone or crushed concrete is spread in layers.
- Compact the base: Each layer is pressed down with a whacker plate to create a firm foundation.
- Set the edges: Kerbs, blocks, or borders are fixed to keep the driveway shape stable.
Good ground preparation helps avoid common installation mistakes, such as sinking, cracks, puddles, and loose edges. Installation timescales depend on the area size, ground condition, driveway material, and weather. Winter installation needs more care because wet or frozen ground affects digging, drainage, and compaction.
Why is ground preparation important for driveway installation?
Ground preparation is the most critical factor for a driveway’s longevity. Ground preparation means clearing, digging, levelling, draining, and compacting the site before the driveway surface is laid. It gives the driveway a firm base and helps stop early damage.
Here is why proper site preparation is essential to prevent costly future repairs:
- Stops sinking: A well-dug and compacted base keeps the driveway firm under cars and vans.
- Reduces cracks: Weak soil and poor base work often lead to cracks in concrete, tarmac, resin, and paving.
- Improves drainage: Good levels help rainwater flow away from the house and driveway surface.
- Keeps edges stable: Strong edging stops gravel, blocks, and paving from moving out of place.
- Supports each installation step: Proper ground preparation helps the membrane, sub-base, bedding layer, and final surface work together.
- Prevents common installation mistakes: Poor digging, soft spots, weak compaction, and bad drainage cause many driveway problems.
Installation timescales depend on the ground condition, driveway size, and surface type. Winter installation needs extra care because wet or frozen soil makes compaction and drainage harder.
What sub-base is needed for a strong driveway?
To build a strong, long-lasting driveway, you need a minimum of 100mm to 150mm after compaction of compacted crushed aggregate, such as MOT Type 1. A driveway sub-base is the load-bearing stone layer placed between the prepared ground and the final surface. It spreads vehicle weight and helps stop sinking, cracks, and uneven areas.
Installing a proper sub-base requires a few key steps to prevent sinking or cracking:
- Prepare the ground: The area is cleared, dug, levelled, and checked for soft spots before stone is added.
- Lay a membrane: A geotextile membrane separates the soil from the aggregate and helps with water movement.
- Add crushed stone: MOT Type 1, crushed concrete, or angular hardcore is spread across the driveway area.
- Build in layers: The sub-base is added in layers rather than one thick pile. This gives better strength.
- Compact each layer: A whacker plate presses the stone down until it forms a firm, stable base.
- Check the levels: The installer checks the fall so rainwater drains away from the house.
- Support the edges: Kerbs, blocks, or borders hold the sub-base and surface in place.
Good sub-base work is one of the most important driveway installation steps. Poor ground preparation, thin stone, weak compaction, and bad drainage are common installation mistakes. Installation timescales depend on the driveway size, soil condition, and weather. Winter installation needs extra care because wet or frozen ground affects compaction.
How does compacting prevent driveway sinking?
Compacting the ground and base layers prevents driveways from sinking by forcing out trapped air and locking the stone together. Compacting means pressing soil, hardcore, or MOT Type 1 with a whacker plate or roller to create a firm load-bearing base.
The compaction process prevents future settling through several key mechanisms:
- Removes air gaps: Loose soil and stone contain small voids. Compaction closes these gaps and makes the base denser.
- Locks the aggregate: Crushed stone binds together when pressed hard. This helps the driveway carry car and van weight.
- Creates a level base: A compacted sub-base gives the surface an even support layer.
- Reduces soft spots: Weak ground areas are easier to find during compaction. These areas need more stone or extra digging.
- Improves drainage: A firm, well-shaped base helps rainwater move away instead of sitting under the surface.
- Prevents common installation mistakes: Poor compaction often causes dips, cracks, loose paving, puddles, and early repair work.
Good compaction is one of the key driveway installation steps. Installation timescales depend on the ground condition, driveway size, weather, and surface type. Winter installation needs more care because wet or frozen ground is harder to compact.
Why does poor ground preparation cause driveway failure?
Poor ground preparation is the leading cause of driveway failure because the sub-base is the true weight-bearing foundation. Ground preparation means clearing, digging, levelling, draining, and compacting the site before the driveway surface is laid.
Here is how poor groundwork triggers premature failure:
- Weak sub-base: A thin or loose sub-base cannot support cars and vans. The surface then sinks, dips, or cracks.
- Poor compaction: Loose soil and stone move under weight. Proper compaction locks the base together and keeps the driveway firm.
- Bad drainage: Water trapped under the surface softens the ground. This leads to puddles, cracks, frost damage, and loose edges.
- Soft spots: Roots, clay, old rubble, and weak soil create uneven support. These areas often sink first.
- Unstable edges: Poor edging lets blocks, gravel, resin, or tarmac spread sideways under pressure.
- Wrong installation steps: Skipping the membrane, using the wrong stone, or rushing the base work causes early driveway damage.
Installation timescales depend on the driveway size, ground condition, and surface type. Winter installation needs extra care because wet or frozen ground makes digging, drainage, and compaction harder.
How does drainage affect driveway installation?
Drainage is the most critical factor in driveway installation. It determines the lifespan of the base layers, dictates the choice of materials, and controls how rainwater leaves the surface. Driveway drainage means the planned movement of water away from the driveway, house, paths, and public drains.
How drainage directly influences the installation process includes:
- Ground preparation: The ground is shaped with a slight fall so water moves away from the property.
- Material choice: Permeable block paving, gravel, resin bound stone, and porous surfaces help water pass through the driveway.
- Sub-base design: The base needs the right stone depth and compaction to support weight and let water move safely.
- Drainage channels: Some driveways need linear drains, soakaways, or water collection points to manage heavy rain.
- Installation timescales: Extra drainage work adds time to the project, especially on large or sloped driveways.
- Winter installation: Wet or frozen ground makes drainage checks harder. The base also needs more care before surfacing.
- Installation mistakes: Poor drainage causes puddles, soft ground, cracks, loose edges, moss growth, and early driveway failure.
Good drainage supports every driveway installation step. It protects the sub-base, keeps the surface safer, and helps the driveway last longer.
What drainage does a driveway need?
Driveway drainage depends primarily on its material and slope. Impermeable surfaces, such as concrete or tarmac, need built-in systems such as channel drains, soakaways, or a clear fall away from the house. Driveway drainage means the way rainwater is moved off, through, or away from the driveway surface.
Specific drainage setups are generally dictated by your driveway’s layout and local regulations:
- Channel drains: These collect surface water from tarmac, concrete, and other sealed driveway surfaces.
- Soakaways: These take rainwater from the driveway and let it drain into the ground safely.
- Permeable paving: This lets water pass through the joints and into a free-draining sub-base.
- Gravel drainage: Gravel allows water to pass through the surface when the ground preparation is correct.
- Resin bound drainage: Resin bound stone is porous, so water drains through the surface into the base below.
- Correct fall: The driveway needs a slight slope so water moves away from the house, garage, and paths.
- Strong sub-base: The base must support vehicles and help water move without softening the ground.
Drainage affects the main driveway installation steps, from ground preparation to final surfacing. Poor drainage is one of the most common installation mistakes. It causes puddles, weak base layers, frost damage, cracks, and early driveway failure. Installation timescales may increase when drains, soakaways, or extra base work are needed. Winter installation also needs care because wet or frozen ground can slow drainage work.
When is a permeable driveway surface required?
A permeable surface is legally required for new or replacement driveways in your front garden if the total area exceeds 5 m² and the design does not send water to a lawn, border, soakaway, or other permeable area. A permeable driveway surface means a finish that lets rainwater pass through or drain safely within the property.
This rule affects the main driveway installation steps. The installer needs to plan drainage before ground preparation starts. Permeable block paving, gravel, porous tarmac, and resin bound stone all need the right sub-base below them. The base must hold vehicle weight and allow water to move through it.
Installation timescales often increase when extra drainage work is needed. Winter installation also needs care because wet or frozen ground slows digging, compaction, and water testing. Common installation mistakes include laying an impermeable surface without drainage, sending water towards the road, and using a weak sub-base under a permeable finish.
How can poor drainage damage a new driveway?
Poor drainage damages a new driveway by allowing trapped water to weaken the base, soften the ground, and break down the surface. Poor drainage means rainwater does not move away from the driveway safely. It often sits on the surface, collects under the base, or flows towards the house.
Here are the ways poor drainage degrades a driveway:
- Weakens the sub-base: Water trapped under the surface makes the stone base less stable. This leads to sinking and dips.
- Creates puddles: Bad levels leave standing water on the driveway. This makes the surface slippery and marks the finish.
- Causes cracks: Water pressure and frost movement put stress on concrete, tarmac, resin, and block paving.
- Loosens edges: Water washes fine material away from kerbs, borders, and paving joints.
- Encourages moss and weeds: Damp areas attract moss, algae, and weed growth between joints and edges.
- Delays installation timescales: Extra drainage work, wet ground, and poor water flow add more time to the project.
- Makes winter installation harder: Frozen or wet ground affects digging, compaction, and curing.
Good drainage is one of the key driveway installation steps. It starts during ground preparation and helps avoid common installation mistakes, such as poor falls, weak base layers, blocked drains, and early surface failure.
Which surface works best for driveway installation?
The best driveway surface depends on your local climate, budget, and aesthetic preferences. Overall, resin-bound is widely chosen for a neat finish, good drainage, and strong kerb appeal. A driveway surface is the top layer that cars drive on, such as resin, block paving, tarmac, gravel, or concrete.
Review these leading driveway materials to decide which best fits your project:
- Resin-bound: Resin-bound stone gives a smooth, modern finish. It drains well when laid on the right base.
- Block paving: Block paving suits homes that need a smart, patterned look. Damaged blocks are easy to lift and replace.
- Tarmac: Tarmac works well for large driveways and busy family homes. It gives a plain, strong, and cost-friendly surface.
- Gravel: Gravel is quick to install and often costs less than other options. It needs good edging to stop stone spread.
- Concrete: Concrete creates a hard, long-lasting surface. It needs proper ground preparation to reduce cracks.
- Permeable paving: Permeable surfaces help rainwater drain through the driveway and reduce water run-off.
Each surface affects the main driveway installation steps, from excavation to sub-base depth and finishing. Installation timescales also change by material. Winter installation needs extra care because cold or wet ground can affect resin, concrete, tarmac, and compaction. Common installation mistakes include choosing the wrong surface for the slope, poor drainage, weak edging, and rushed ground preparation.
How does block paving driveway installation work?
Installing a block paving driveway involves excavating the area, usually 200–250mm deep, laying and compacting a crushed stone sub-base, adding sharp sand, and placing the blocks in the chosen pattern. The blocks are then cut at the edges, compacted, and filled with kiln-dried sand to lock the surface together.
Good ground preparation is vital because block paving depends on a firm and even base. The driveway also needs the right fall for drainage, so rainwater does not sit on the surface or run towards the house. Edging is fixed before the blocks are laid, as this keeps the paving in shape under car weight.
Installation timescales depend on the driveway size, pattern, access, and weather. Winter installation needs extra care because wet or frozen ground affects digging, compaction, and sand bedding. Common installation mistakes include a weak sub-base, poor drainage, loose edges, uneven sand, and gaps that are not filled well.
How does resin driveway installation work?
Resin driveway installation involves excavating the area, installing a solid and porous sub-base, and laying a smooth resin-bound surface over the top. The installer first clears the site, checks the levels, and prepares the ground for drainage. Good ground preparation is vital for a resin driveway. The base must be firm, clean, and stable before the resin and stone mix is laid. A weak base often leads to cracks, dips, loose patches, and poor water flow.
The main driveway installation steps include digging out the area, adding compacted stone, setting the edges, and checking the fall for rainwater. The resin-bound mix is then spread by hand and trowelled level to create a neat finish.
Installation timescales depend on the driveway size, access, weather, and base condition. Winter installation needs extra care because cold, damp, or frozen ground affects curing and surface bonding. Common installation mistakes include poor drainage, thin base layers, rushed curing, and laying resin on an unsuitable surface.
How does tarmac driveway installation work?
Tarmac driveway installation involves excavating the old surface, establishing proper drainage, installing edge restraints, and laying hot asphalt in compacted layers. The work starts with ground preparation, where the area is cleared, dug out, levelled, and checked for soft spots.
A strong sub-base is then added and compacted to support car weight. The installer also sets kerbs or borders to keep the tarmac in place. Good drainage is planned at this stage, so rainwater runs away from the house and does not sit on the surface.
The tarmac is laid in layers while hot. A base course gives strength, and a finer top layer creates the finished surface. Each layer is rolled flat to form a firm, smooth driveway.
Installation timescales depend on driveway size, access, weather, and base condition. Winter installation needs extra care because cold or wet ground affects compaction and curing. Common installation mistakes include poor drainage, weak edging, thin tarmac, and rushed ground preparation.
How does gravel driveway installation work?
Installing a gravel driveway requires building a layered, load-bearing foundation to prevent sinking, rutting, and stone movement. The work starts with ground preparation. The installer clears the old surface, removes weeds and roots, digs to the right depth, and checks the fall for drainage.
A geotextile membrane is then laid over the soil. This helps stop the sub-base from mixing with the ground below. MOT Type 1 stone or crushed concrete is added next and compacted in layers to create a firm base.
Edging is also important for gravel driveways. Kerbs, timber, blocks, or metal borders keep the gravel in place and stop it spreading onto paths or lawns. A gravel grid may also be used to hold the stones steady under car tyres.
The final gravel layer is spread, raked level, and checked for an even finish. Installation timescales depend on the driveway size, access, base depth, and weather. Winter installation needs care because wet or frozen ground affects digging and compaction. Common installation mistakes include poor edging, weak compaction, thin gravel, and bad drainage.
How does concrete driveway installation work?
Installing a concrete driveway involves excavating the area, compacting a sturdy sub-base, setting up wooden forms, and pouring concrete to create a hard, stable surface. The work starts with ground preparation. The installer clears the site, removes old material, digs to the right depth, and checks the fall for drainage.
A compacted sub-base is then added to support vehicle weight and reduce movement. Timber forms are fixed around the edges to hold the wet concrete in shape. The concrete is then poured, spread, levelled, and finished with a smooth or brushed texture.
Concrete needs time to cure before cars use the driveway. Installation timescales depend on the driveway size, access, weather, and base condition. Winter installation needs extra care because cold or wet ground slows curing and affects strength. Common installation mistakes include poor ground preparation, weak compaction, bad drainage, thin concrete, and using the driveway too soon.
How long does driveway installation take?
Driveway installations take about 3 to 7 days from excavation to completion. Driveway installation timescale means the full time needed for ground preparation, drainage, sub-base work, edging, surface laying, and final curing.
A typical installation process follows these steps:
- Day 1: Site preparation: The old surface, roots, soil, weeds, and waste are removed from the driveway area.
- Day 1–2: Excavation: The ground is dug to the right depth for the driveway surface, soil type, and vehicle use.
- Day 2–3: Sub-base work: MOT Type 1 stone or crushed concrete is added and compacted in layers.
- Day 3–4: Drainage and edging: The installer checks water flow, adds drainage where needed, and fixes kerbs or borders.
- Day 4–6: Surface laying: The chosen surface is laid. This may be resin, block paving, tarmac, gravel, or concrete.
- Day 6–7: Finishing and curing: The driveway is checked, cleaned, levelled, and left to set where needed.
Installation timescales vary by driveway size, access, weather, material, and ground condition. Winter installation often takes longer because cold, wet, or frozen ground slows digging, compaction, and curing. Common installation mistakes include rushed ground preparation, weak compaction, poor drainage, and using the driveway too soon.
What affects driveway installation timescales?
Driveway installation timescales typically range from 3 to 10 days. Installation timescale means the full time needed to complete each driveway installation step, from ground preparation to final curing. The exact time depends on the driveway size, surface type, access, weather, drainage work, and base condition.
Large driveways take longer because more ground needs clearing, digging, levelling, and compacting. Poor ground preparation also adds time, especially when soft soil, roots, old concrete, or weak base layers need removal. Drainage work can extend the project if channels, soakaways, or permeable layers are needed.
The chosen surface also affects the schedule. Gravel is often quicker to lay than block paving, resin, concrete, or tarmac. Concrete and resin need suitable weather and curing time before cars use the surface. Winter installation often takes longer because cold, wet, or frozen ground slows excavation, compaction, bonding, and drying.
Common installation mistakes also delay the work. These include poor planning, weak compaction, bad drainage, thin sub-base layers, and laying the final surface too soon.
When can you use a new driveway after installation?
Wait at least 7 to 10 days before parking on a new concrete driveway. Driveway curing time means the waiting period after installation before the surface can safely take vehicle weight. The right waiting time depends on the driveway material, weather, ground preparation, and final surface finish.
Gravel driveways are often ready sooner once the sub-base is compacted and the top layer is level. Block paving can usually take light use after the joints are filled and the blocks are compacted. Tarmac may need 24 to 72 hours before parking. Resin driveways often need at least 24 to 48 hours to cure in dry weather.
Installation timescales can change during winter installation because cold, wet, or frozen ground slows curing and bonding. Common installation mistakes include parking too soon, turning wheels sharply on fresh tarmac, walking on wet resin, and using concrete before it gains enough strength. A good installer checks the surface before normal use begins.
Can you install a driveway in winter?
Yes, you can install a new driveway in the winter, but it depends heavily on the ground condition, weather, and surface type. Winter driveway installation means laying a driveway during cold, wet, icy, or frost-prone months, when digging, compaction, drainage, and curing need extra care.
Winter installations require specific strategies and have distinct drawbacks:
- Ground preparation: The ground must be clear, firm, and free from frost before the base is laid.
- Drainage checks: Rainwater needs a clear route away from the driveway, as winter rain can soften the sub-base.
- Sub-base compaction: MOT Type 1 stone or crushed concrete must be compacted well in dry, stable layers.
- Surface choice: Gravel and block paving are often easier in winter than resin, concrete, or tarmac.
- Curing time: Resin, concrete, and tarmac need the right temperature and dry conditions to set well.
- Installation timescales: Winter projects often take longer because wet, cold, or frozen ground slows the work.
- Installation mistakes: Common mistakes include laying on frozen ground, rushing compaction, ignoring drainage, and surfacing during heavy rain.
A good installer checks the forecast, soil, base, and water flow before work starts. This helps the driveway stay firm, drain well, and avoid early cracks, dips, or loose patches.
What are the most common driveway installation mistakes?
Failing to excavate deep enough, skipping the gravel sub-base, and ignoring proper drainage are the most common driveway installation mistakes. Driveway installation mistakes are errors in ground preparation, base work, drainage, edging, or surface laying that reduce the strength and lifespan of the driveway.
Here are the 5 major driveway installation mistakes:
- Poor excavation: Shallow digging leaves weak soil under the driveway. This often leads to sinking, dips, and cracks.
- Weak sub-base: A thin or loose stone base cannot support cars and vans. MOT Type 1 stone must be laid and compacted well.
- Bad drainage: Poor water flow causes puddles, soft ground, frost damage, and surface movement.
- Loose edging: Weak kerbs or borders let gravel, blocks, tarmac, or resin spread at the sides.
- Rushed installation timescales: Each stage needs enough time. Fast work often means poor compaction, weak curing, and uneven finishing.
Winter installation needs extra care because wet or frozen ground makes these mistakes more likely. A strong driveway starts with clear steps, good ground preparation, firm compaction, safe drainage, and the right surface for the site.
What mistakes happen during driveway installation?
Driveway failures most commonly stem from skipping critical groundwork. The most frequent mistakes include installing an inadequate sub-base, poor drainage, weak edging, and rushing the final surface. These errors affect the strength, shape, and lifespan of the driveway.
Common driveway installation mistakes and their consequences include:
- Shallow excavation: The ground is not dug deep enough. This leaves soft soil under the driveway and causes sinking.
- Poor ground preparation: Roots, old rubble, weeds, and weak soil are left in place. This creates dips and uneven areas.
- Thin sub-base: Too little MOT Type 1 stone is used. The driveway then lacks proper support for cars and vans.
- Weak compaction: Loose stone is not pressed down well. This leads to movement, ruts, and cracks.
- Bad drainage: Rainwater has no clear route away. This causes puddles, soft ground, frost damage, and surface failure.
- Loose edging: Kerbs or borders are not fixed well. Gravel, blocks, resin, or tarmac can spread at the sides.
- Rushed installation timescales: The base or surface is used too soon. This causes marks, cracks, loose joints, and early repair work.
Winter installation needs extra care because wet or frozen ground makes these mistakes more likely.
Why do driveways sink after installation?
Driveways typically sink because the underlying support has shifted or weakened. This often happens when the ground, sub-base, drainage, or compaction was not prepared well during installation. A sinking driveway is a surface that drops, dips, or becomes uneven after cars start using it.
The most common reasons for a sinking driveway include:
- Weak ground preparation: Soft soil, roots, rubble, or loose material left under the driveway can move over time.
- Shallow excavation: The ground may not be dug deep enough to hold the right base depth and surface layer.
- Thin sub-base: A weak stone base cannot spread vehicle weight properly. This creates dips and low spots.
- Poor compaction: Loose MOT Type 1 stone or hardcore settles after use when it is not compacted in firm layers.
- Bad drainage: Trapped water softens the ground and washes fine material away from the base.
- Heavy vehicle use: Vans, delivery vehicles, and repeated parking can expose weak base work faster.
- Rushed installation timescales: Using the driveway too soon can damage fresh tarmac, concrete, resin, or block paving.
Winter installation needs extra care because wet or frozen ground increases the risk of later movement. Good driveway installation steps reduce sinking by using proper excavation, strong base layers, firm compaction, stable edging, and safe drainage.
Why do driveways crack after installation?
Driveways crack prematurely due to poor site preparation, incorrect concrete mixes, inadequate curing, weak base layers, or poor drainage. Cracking often starts when the surface has uneven support below it. The driveway may look solid on top, but weak ground preparation causes pressure points under cars, vans, and changing weather.
A thin sub-base, loose MOT Type 1 stone, or soft soil lets the surface move. This movement creates stress in concrete, tarmac, resin, and block paving. Trapped water also causes damage. It softens the base, freezes in cold weather, and pushes against the surface. This is one of the most common installation mistakes.
Concrete driveways also crack when the mix is too wet, the slab is too thin, or the surface dries too fast. Resin and tarmac may crack when they are laid on a weak or damp base. Block paving may open up when the edges are loose or the joints are not filled well.
Installation timescales also matter. Using a driveway too soon can mark, crack, or weaken the surface before it has cured. Winter installation needs extra care because cold, wet, or frozen ground affects compaction, bonding, drainage, and curing.
How can poor edging affect driveway installation?
Poor edging can drastically reduce the lifespan of a driveway by letting the surface move, spread, crack, or lose shape. Edges support the sides of the driveway and keep the sub-base, bedding layer, and surface in place under car weight.
The effects of poor or missing edge restraints vary depending on the driveway material:
- Block paving: Weak edging lets the blocks move sideways. This creates gaps, loose joints, and uneven lines.
- Gravel: Poor edging allows loose stone to spread onto lawns, paths, and roads. It also creates thin areas on the driveway.
- Resin-bound: Weak edges can cause cracking, loose corners, and surface breaks near the borders.
- Tarmac: Loose edging lets the tarmac crumble at the sides, especially where cars turn or park.
- Concrete: Poor edge support can lead to corner cracks and broken slab edges.
Good edging is one of the key driveway installation steps. It works with ground preparation, drainage, and compaction to keep the driveway stable. Installation timescales may increase when kerbs, blocks, or borders need extra fixing. Winter installation needs care because wet or frozen ground makes edge setting harder. Common installation mistakes include shallow edge foundations, weak concrete bedding, and poor alignment.
How can weak drainage cause installation problems?
Weak drainage compromises the surrounding earth, leading to soil erosion, shifting foundations, soft ground, and early driveway damage. Poor slopes, weak pipe bedding, blocked channels, or undersized drains stop rainwater from leaving the driveway in a safe way.
Here is how weak drainage triggers a cascading cycle of installation problems:
- Soft ground: Trapped water weakens the soil below the driveway. This makes ground preparation harder and less stable.
- Sub-base movement: Water washes fine material away from the stone base. The driveway then loses firm support.
- Sinking and dips: Weak ground and loose base layers settle under car weight. This creates uneven areas.
- Cracks and loose edges: Water pressure and frost movement push against concrete, tarmac, resin, gravel, and block paving.
- Longer installation timescales: Extra drainage work, wet ground, and base repairs add more time to the project.
- Harder winter installation: Cold, wet, or frozen ground slows digging, compaction, drainage checks, and curing.
- Common installation mistakes: Poor falls, blocked drains, shallow channels, weak pipe bedding, and rushed ground preparation often lead to early driveway failure.
Strong drainage supports every driveway installation step. It keeps the base dry, protects the surface, and helps the driveway last longer.
What should you check before choosing driveway installation?
Before choosing a driveway installation, you must evaluate the project scope, local regulations, ground condition, drainage needs, surface choice, and budget. These checks help you choose the right driveway type and avoid costly problems after the work is complete.
Here are the key driveway installation considerations:
- Driveway size: Measure the area, parking space, access, and turning room before work starts.
- Ground condition: Check for soft soil, roots, old rubble, clay, slopes, and weak areas.
- Drainage needs: Plan how rainwater will leave the driveway without running towards the house or road.
- Surface choice: Compare resin, tarmac, block paving, gravel, and concrete based on use, look, cost, and care.
- Installation steps: Ask how the installer handles excavation, sub-base work, edging, drainage, surfacing, and curing.
- Installation timescales: Check how long the work will take and when the driveway can be used.
- Winter installation risks: Cold, wet, or frozen ground may slow digging, compaction, bonding, and curing.
- Common installation mistakes: Avoid weak ground preparation, poor drainage, thin sub-base layers, loose edging, and rushed surface laying.
A strong driveway starts with clear planning. The best choice depends on the site, water flow, vehicle use, and the quality of the base below the surface.
How do driveway costs relate to installation quality?
Driveway costs and installation quality are directly proportional because a stronger driveway needs better ground preparation, deeper base work, proper drainage, firm edging, and skilled labour. A cheap quote may look attractive, but it often cuts time, materials, or key driveway installation steps.
Here is the relationship between cost and quality:
- Ground preparation: Good digging, clearing, levelling, and waste removal take time and labour.
- Sub-base depth: A strong driveway needs enough MOT Type 1 stone or crushed concrete under the surface.
- Compaction: Proper compaction needs the right equipment and repeated passes over each base layer.
- Drainage work: Channels, soakaways, permeable bases, and correct falls add cost but prevent water damage.
- Edging quality: Strong kerbs, borders, or restraints keep the driveway shape stable under car weight.
- Surface finish: Resin, block paving, tarmac, gravel, and concrete all need the right material quality and fitting method.
- Installation timescales: Rushed work often leads to sinking, cracks, puddles, and loose edges.
Winter installation may cost more because wet, cold, or frozen ground needs extra care. Common installation mistakes often happen when the quote is too low to cover proper base depth, drainage, compaction, and curing time.
How do driveway installers affect the final result?
Driveway installers directly determine your driveway’s structural integrity, lifespan, drainage, finish, and long-term value. Their skill affects every stage of the work, from ground preparation to final surfacing. A good installer follows the right driveway installation steps and avoids shortcuts that lead to cracks, sinking, puddles, and loose edges.
Professional installers shape the final result through several key stages:
- Site assessment: They check the soil, slope, access, drainage, and vehicle use before work starts.
- Ground preparation: They remove old surfaces, roots, weak soil, and waste to create a clean base.
- Excavation depth: They dig to the right depth for the chosen driveway surface and expected load.
- Sub-base work: They lay and compact MOT Type 1 stone or crushed concrete in firm layers.
- Drainage planning: They shape the driveway so rainwater moves away from the house and surface.
- Edging support: They fix kerbs, blocks, or borders to keep the driveway stable.
- Surface laying: They install resin, tarmac, block paving, gravel, or concrete with the right finish.
- Installation timescales: They allow enough time for compaction, curing, and final checks.
Winter installation needs extra care because wet or frozen ground affects digging, bonding, drainage, and curing. Common installation mistakes often happen when installers rush the base work, ignore drainage, or use weak edge restraints.
What questions should you ask before driveway installation?
Before installing a new driveway, always ask contractors for a detailed, written breakdown of the quote, timeline, and warranty. The right questions help you understand the full work plan, from ground preparation to final surfacing.
Here are the questions you should ask before driveway installation:
- What driveway installation steps are included? Ask if the quote covers excavation, waste removal, sub-base work, drainage, edging, surfacing, and final checks.
- How deep will you excavate? The digging depth must suit the soil, surface type, and vehicle weight.
- What sub-base will you use? Ask for the stone type, depth, and compaction method. A weak base often causes sinking.
- How will you manage drainage? The installer should explain the fall, channels, soakaway, or permeable surface plan.
- How long will the installation take? Installation timescales depend on the driveway size, weather, access, and material.
- Can the work be done in winter? Winter installation needs extra care because wet or frozen ground affects digging, compaction, and curing.
- What mistakes do you avoid? Ask how they prevent poor drainage, weak edging, thin base layers, cracks, and loose surfaces.
- When can I use the driveway? Each surface needs the right setting or curing time before cars park on it.
A clear answer to each question shows whether the installer understands the site, the material, and the full driveway build.